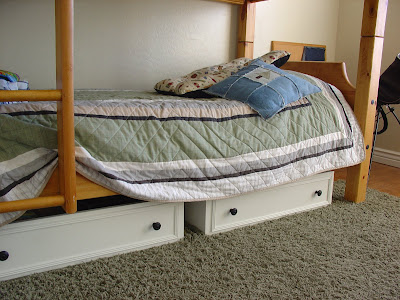
 We have been in need of a dresser for awhile now! We had an old one that was falling apart. Part of the drawers wouldn't come out and part would not go in. Since we can't afford a new dresser now and I haven't been having much luck finding one at a yard sale....I decided to re-purpose the one that we had. I pulled out the four drawers and went to work on two of them(I am going to do something a little different with the other two for another room).
Before
I started out by going to a local hardware store and purchasing some inexpensive trim and some new knobs. I already had one knob and needed to find three more to match. I used my husband's miter-saw(my first time) and cut 45 degree angles on the trim so that I could form a 'box' around the knobs. I'll tell ya....the miter-saw really scared me at first, but once I got started...it was not too bad! To measure the pieces, I cut my first long side and first short side and then just put those up to the molding and drew a pencil line to measure the next pieces.
Next, I just used some wood glue and glued the molding into place. I'm NOT much of a perfectionist, so don't look too close! If my husband was doing this project, he would have the trim cut PERFECT and glued Perfectly centered on the drawer.
Next, I just used some wood glue and glued the molding into place. I'm NOT much of a perfectionist, so don't look too close! If my husband was doing this project, he would have the trim cut PERFECT and glued Perfectly centered on the drawer.
Drawer with molding glued
Then...I sprayed the drawers with some primer and went to town painting them. Lastly....I added the knobs. I thought about adding casters, but it would have cost me about $4-6 more per drawer...so for now they are caster-less. They seem to slide in and out pretty easily though. I will add felt pads to the bottom, if they are ever used on the wood floor. Like I said..I'm NOT a perfectionist...at all!!....BUT I LOVE the end result! So much better than the blue drawers in the dresser and now we have more floor space.


.JPG)


.JPG)


